Docker Compose is a powerful tool that simplifies the process of managing multi-container applications. It allows you to define and run complex applications using a single configuration file, making it easier to develop, test, and deploy your projects.
There are thousands of projects that use Compose to help streamline the development process. You can find a number of excellent examples in the Awesome Compose repository on GitHub.
Today we will show you how you can use Docker Compose with a Daytona workspace. There are two options using the default Daytona workspace and using a dev container. By combining these two tools, you can streamline your development workflow, ensure consistency across different environments, and easily collaborate with your team.
TL;DR
Simplify Multi-Container Management: Use Docker Compose in Daytona workspaces.
Default and Dev Containers: Supports out-of-the-box and customizable environments.
Enhanced Developer Experience: Automate with lifecycle scripts for efficiency.
Whether you are a seasoned developer or just starting with Docker and Daytona, this guide will provide you with the knowledge and practical examples to get started with Docker Compose in your Daytona projects.
Prerequisites
To follow this guide, ensure you have:
1. Basic understanding of Docker and Docker Compose
2. Daytona CLI installed
3. Familiarity with Git
4. Code editor of your choice
Default Daytona Workspace
Daytona provides a default workspace that has a number of tools and languages built into it. Docker and Compose are supported out of the box. As long as your project has a Compose file, you should be able to use it without any additional changes. Lets see how:
1daytona create --name compose https://github.com/docker/awesome-compose
This will generate a new workspace using the repository URL you provided, and it will be named "compose".
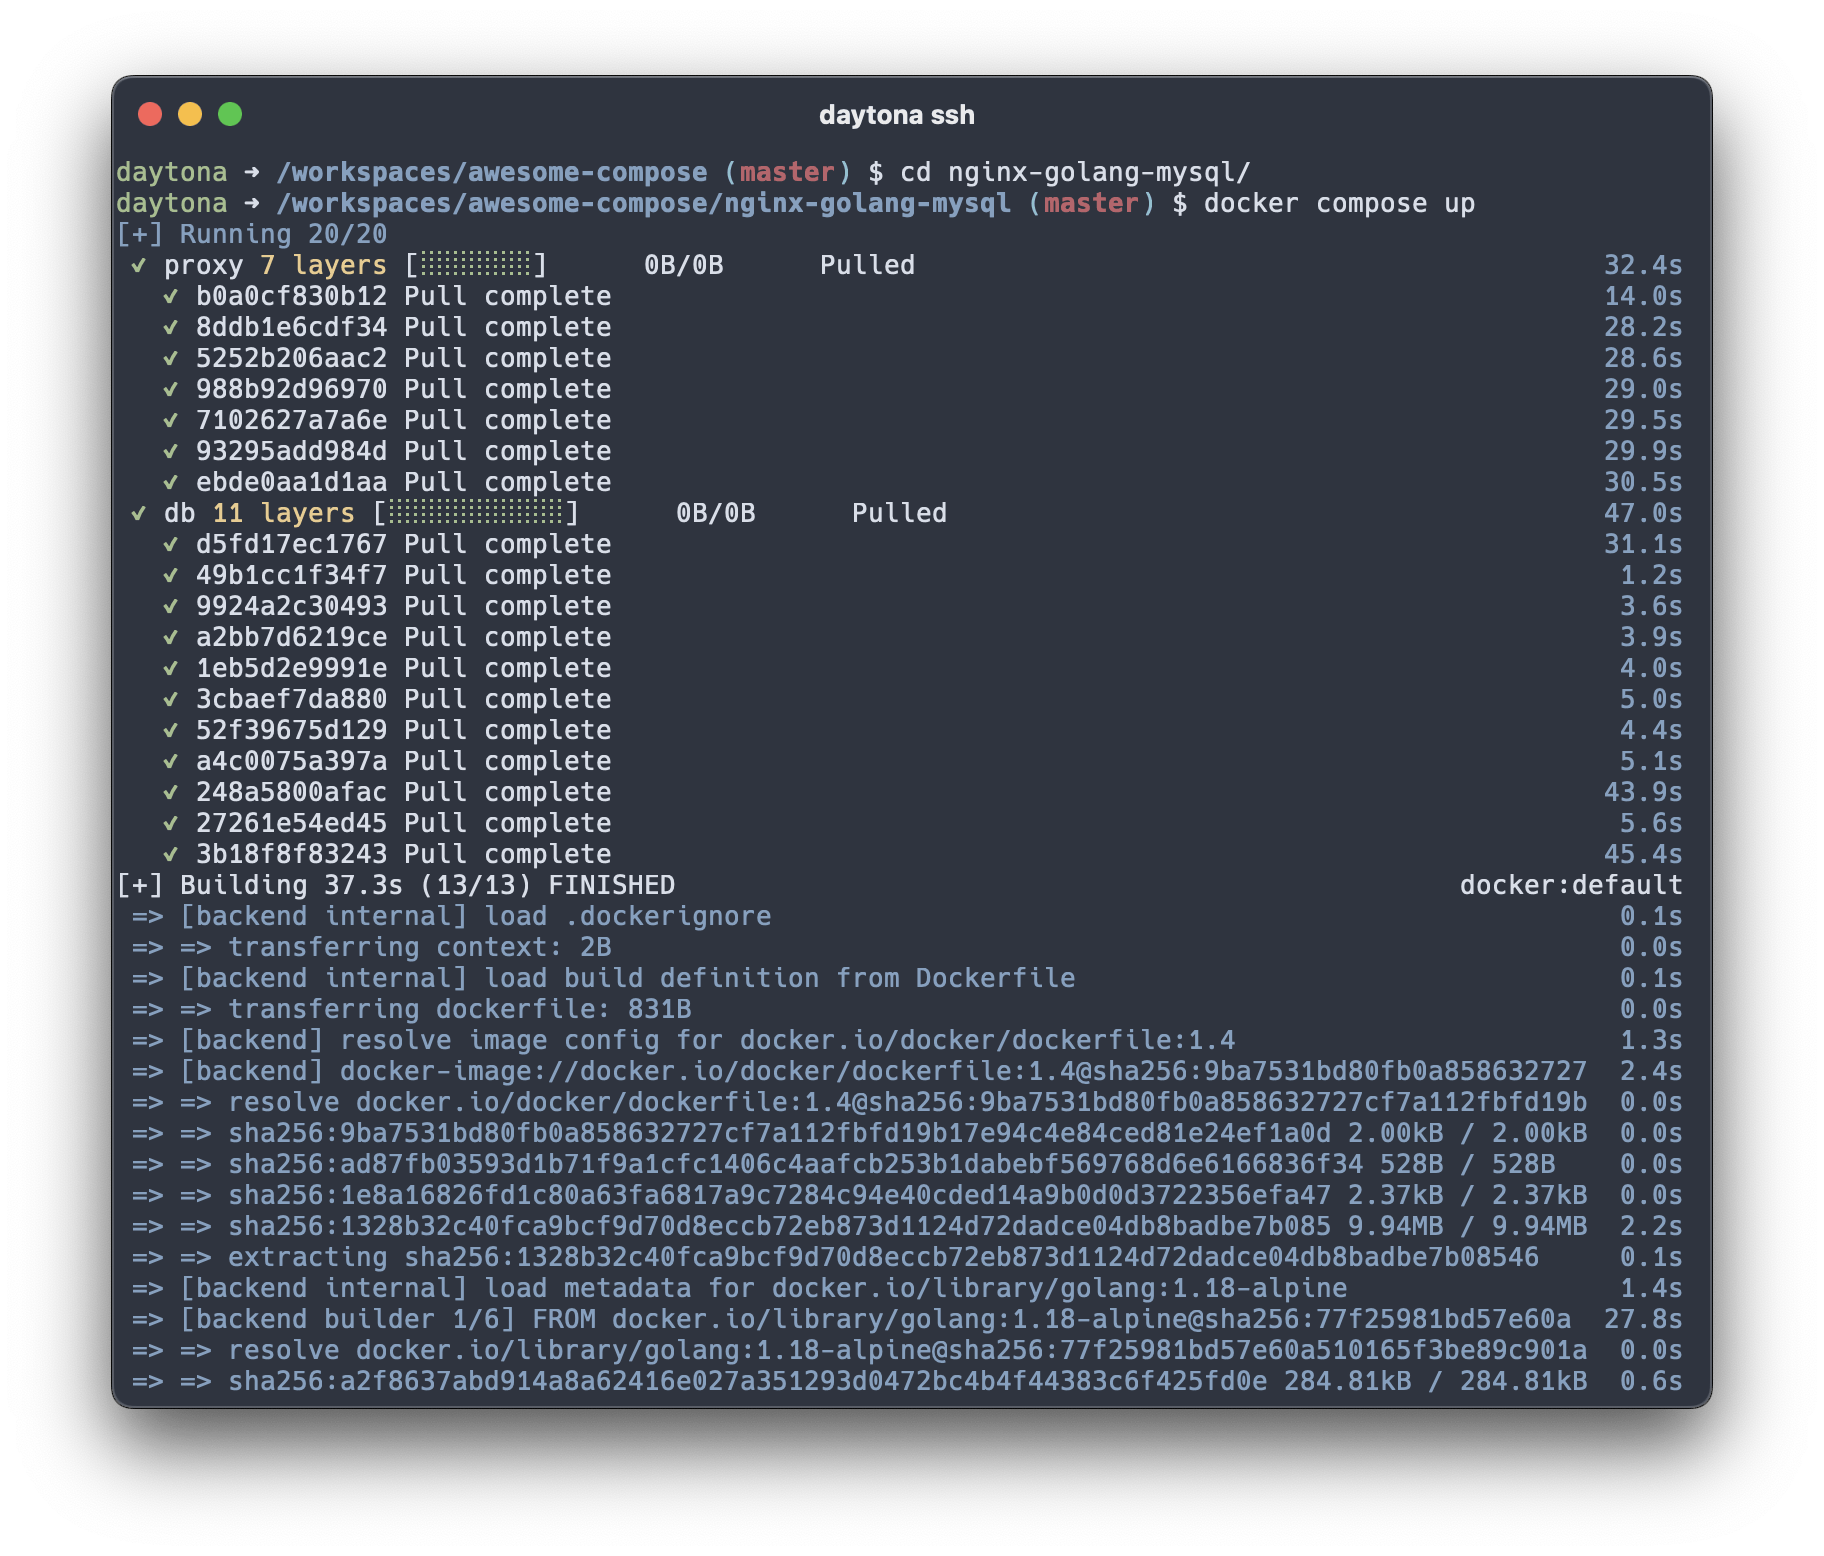
Once the workspace is running, you can ssh to it and use Compose like you would anywhere else.
1daytona ➜ /workspaces/awesome-compose (master) $ cd nginx-golang-mysql/2daytona ➜ /workspaces/awesome-compose/nginx-golang-mysql (master) $ docker compose up
Docker Compose with dev container
Sometimes you want to have more control over the specific versions or technology in your workspace. Daytona supports Microsoft’s dev container specification as one way to accomplish this.
A development container (or dev container for short) allows you to use a container as a full-featured development environment. It can be used to run an application, to separate tools, libraries, or runtimes needed for working with a codebase.
Dev containers can be easily shared and version-controlled, eliminating the "works on my machine" problem. Dev containers can be run locally or remotely with Daytona.
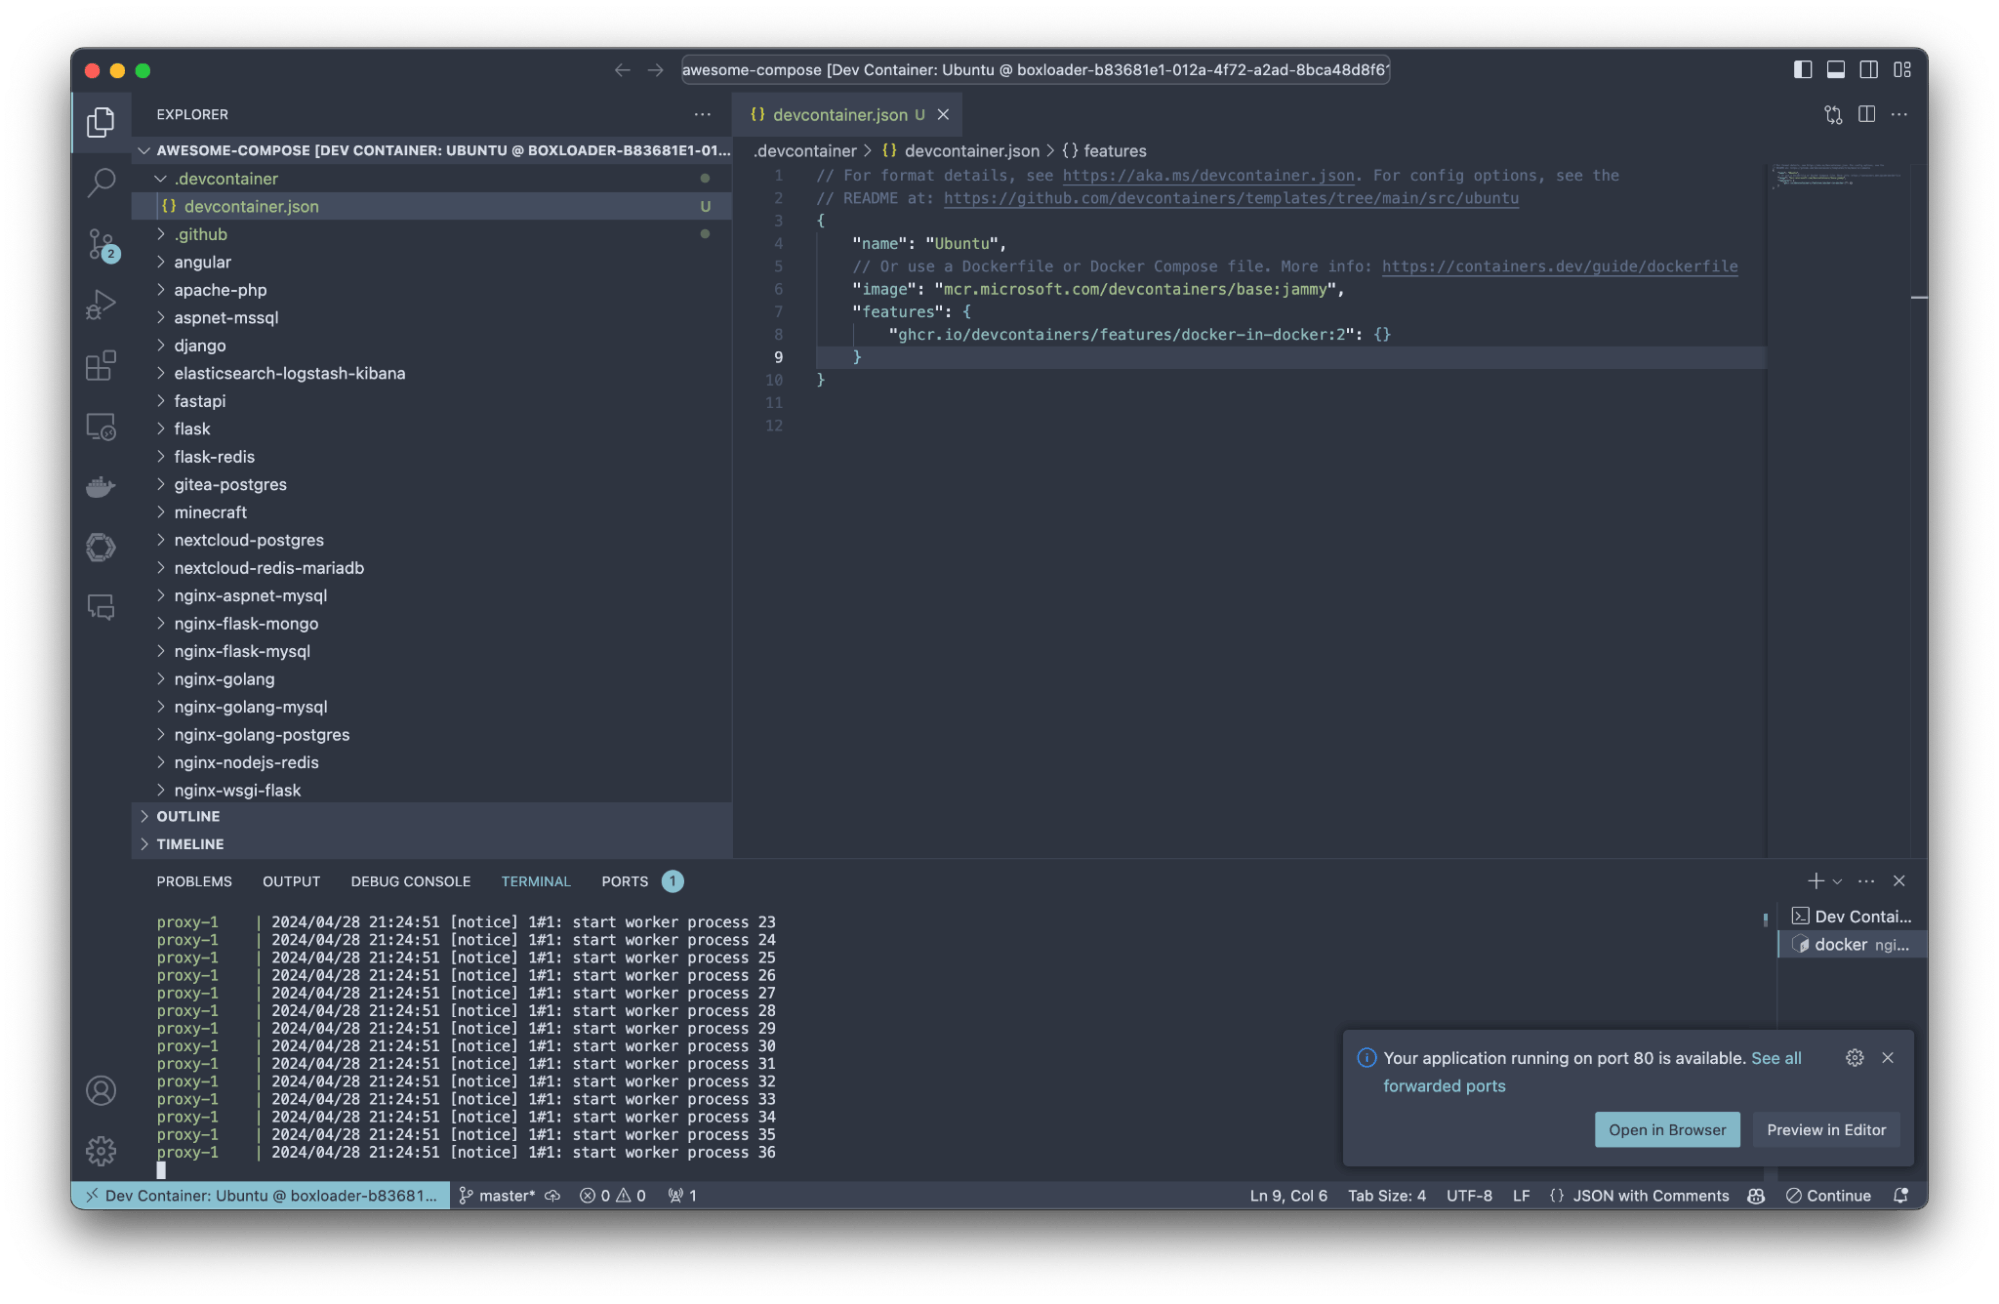
Let's look at a dev container file that adds support for Docker and Compose. We will go over it line by line.
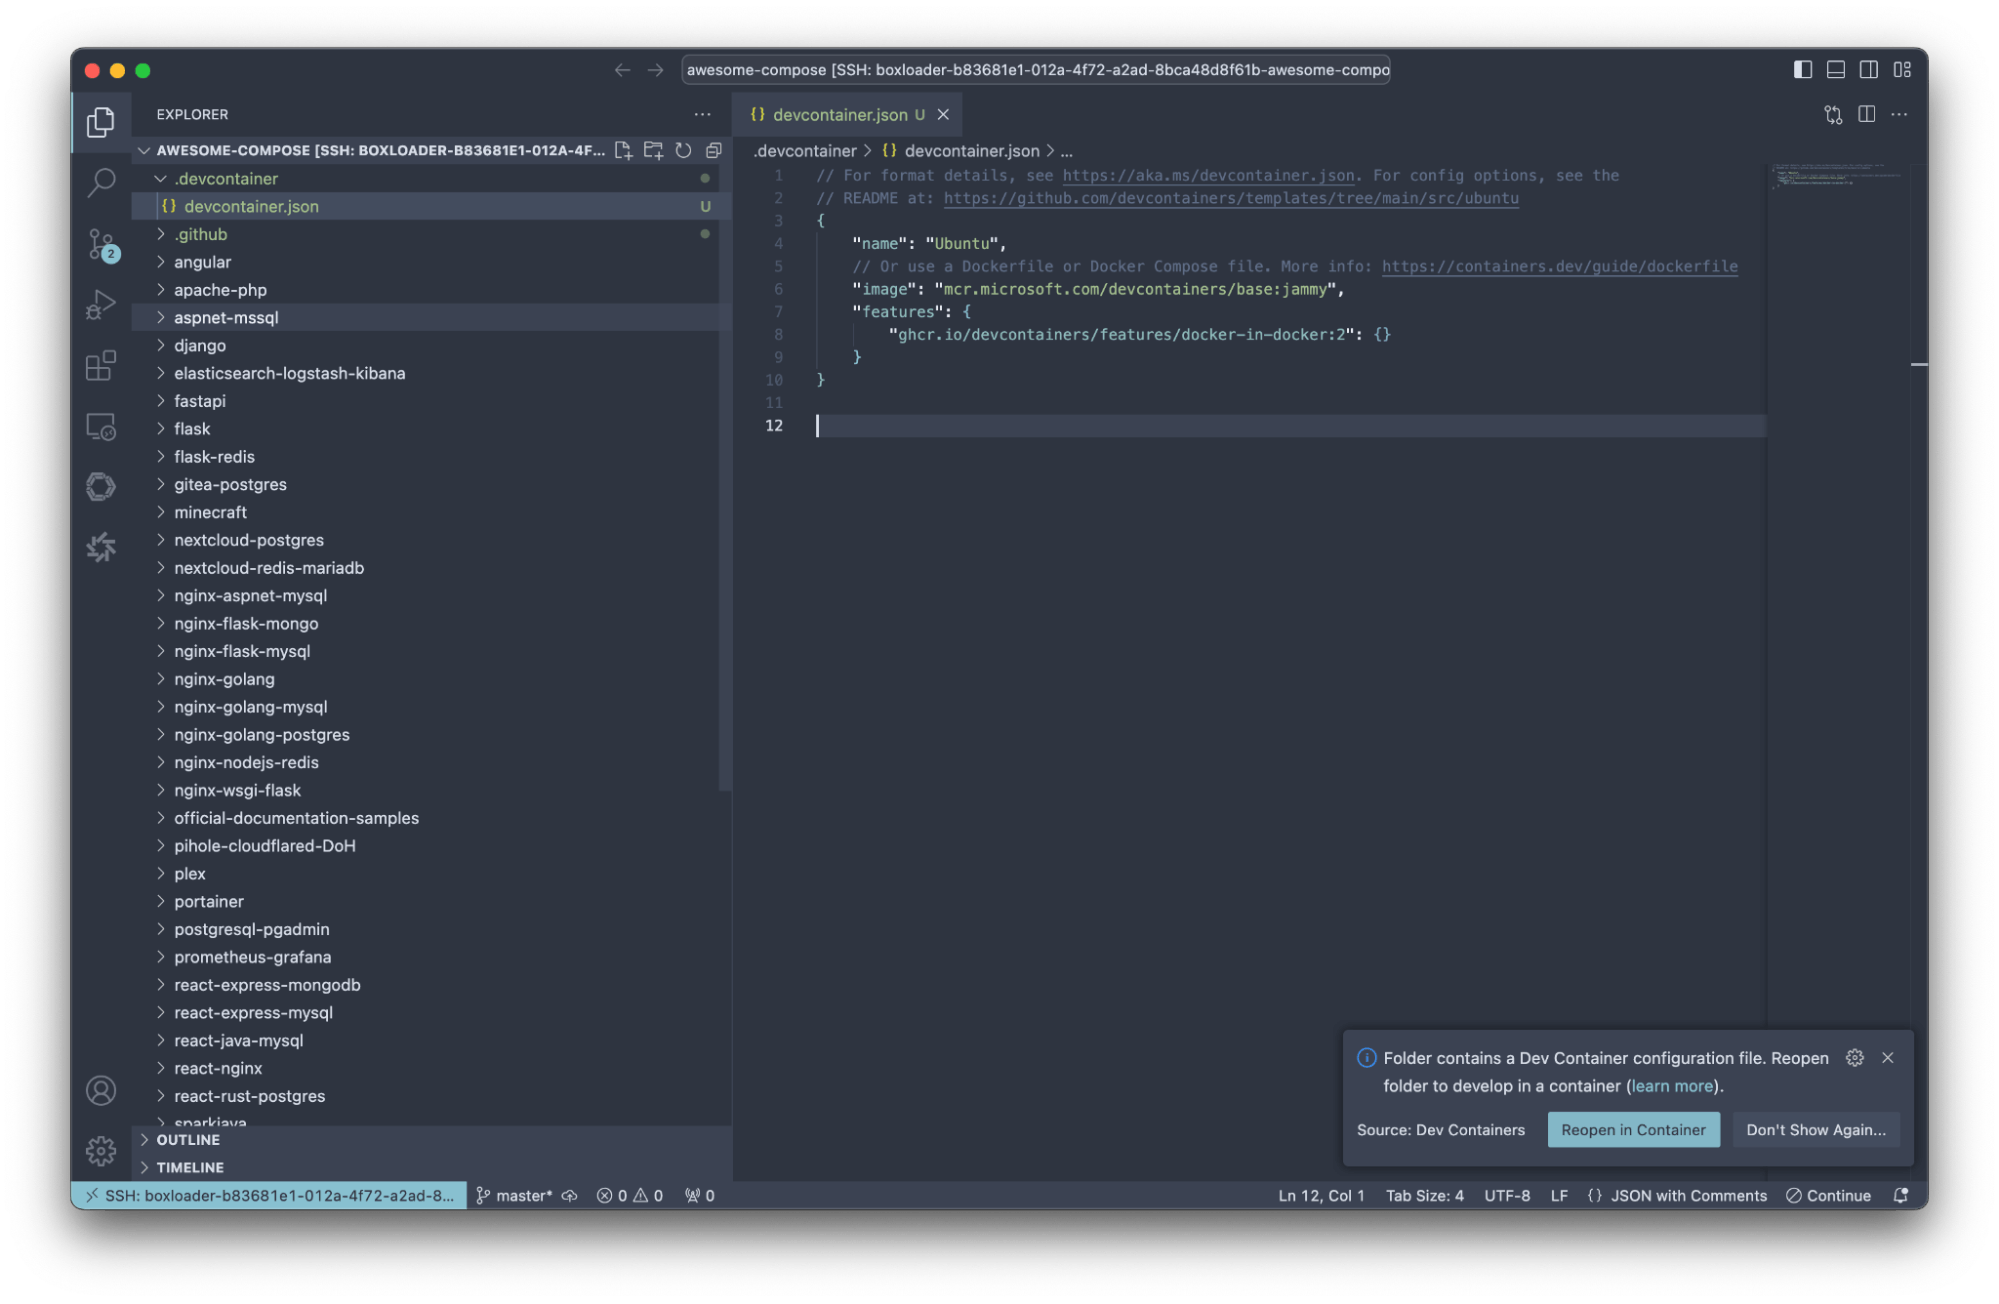
1{2 "name": "Ubuntu",3 "image": "mcr.microsoft.com/devcontainers/base:jammy",4 "features": {5 "ghcr.io/devcontainers/features/docker-in-docker:2": {6 "installDockerBuildx": true,7 "installDockerComposeSwitch": true,8 "version": "latest",9 "dockerDashComposeVersion": "v2"10 }11 }12}13
You can name the dev container anything you want. This does not have to be any specific value, anything that has meaning to your project is fine.
1"image": "mcr.microsoft.com/devcontainers/base:jammy",
This is the base image that this dev container will be built from. In this case, this is an Ubuntu Jammy (22.04 LTS) image. You can find the code for most of Microsoft’s dev container images on GitHub (Ubuntu Jammy). You can see the variants (Jammy and Focal in this case) and the supported architectures (x86-64, aarch64/arm64). To ensure maximum dev container portability, it is recommended to select an image that includes aarch64/arm64 support, which will include newer ARM Macs.
There are other dev container base images that we could have selected (Alpine, Debian, etc). We wanted to pick something common and supported by the Docker feature. This brings us to the next part of the dev container file.
1features": {
Development Container Features are self-contained, portable installation code and development container configuration. The name comes from the idea that referencing one of them allows you to quickly and easily add more tooling, runtime, or library “features” into your development container. You can add as many features as you require. There is a balance between including something in the base image and adding it as a feature. Optimizing dev container builds is a subject in itself which we will leave for later.
1"ghcr.io/devcontainers/features/docker-in-docker:2": {}
This is the Docker feature which is documented fully on GitHub. Features are parameterizable, and you can read the documentation to see what you can configure. For example, if we wanted to use a specific version of Docker:
1"ghcr.io/devcontainers/features/docker-in-docker:2": {2 "version": "20.10"3}
Once you have added this file as .devcontainer/devcontainer.json you will be able to run the dev container. When you open a project with a dev container file VS Code will prompt you to ask if you want to re-open the project with dev container.
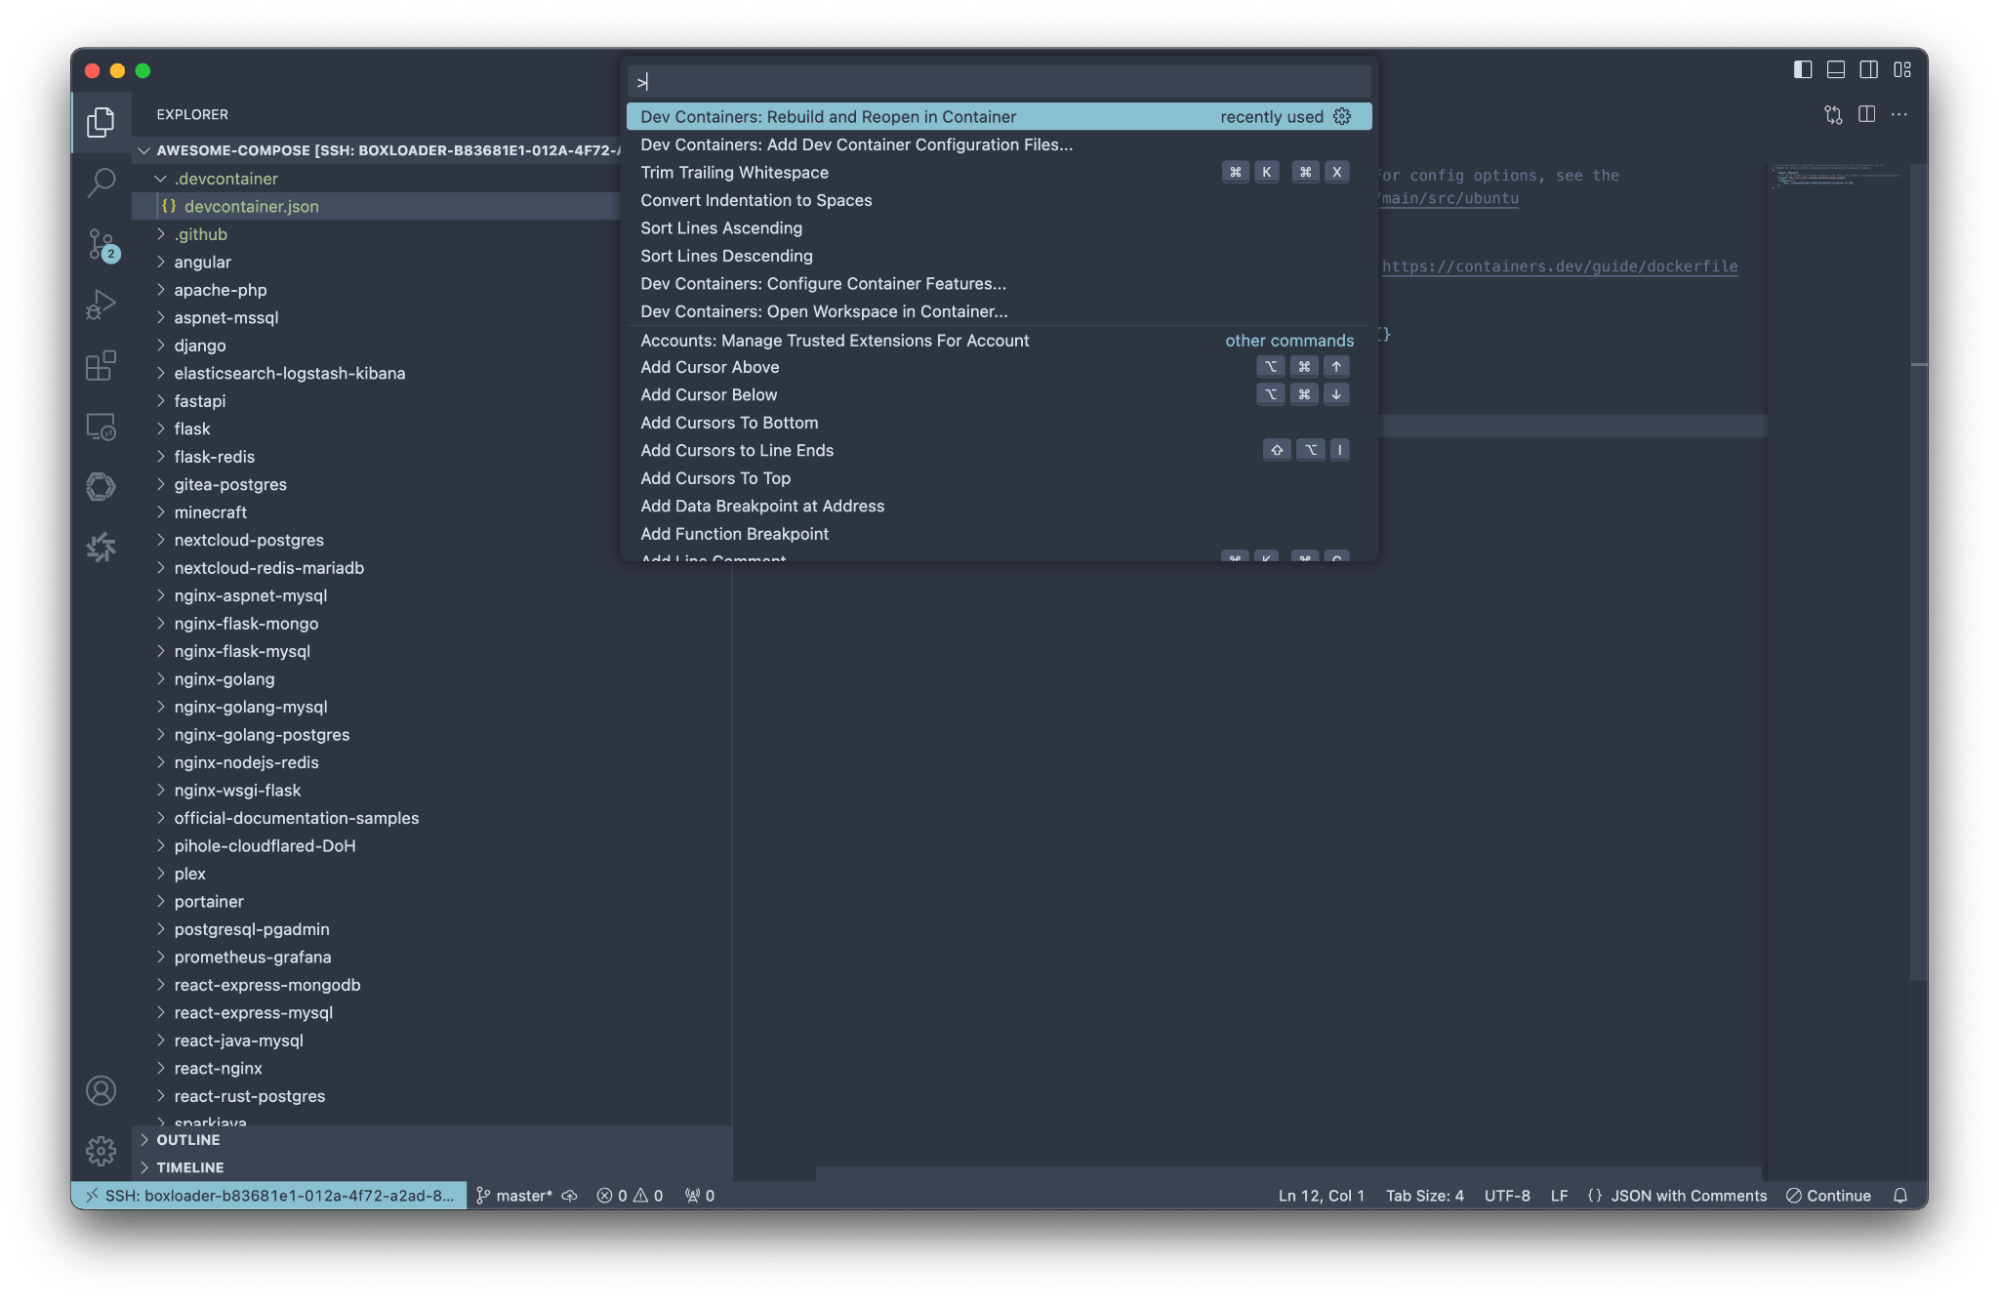
Otherwise you can always command VS Code to Rebuild and Reopen in a Container in the dev container command palette.
Once the dev container is running, you can use it like any other Docker environment. Open a terminal and run docker compose up.
That is all that you need to use Docker with a dev container.
Docker Compose dev container automation
One last topic on using Docker Compose with dev containers is how the developer experience can be improved with lifecycle scripts. Dev container has a number of lifecycle scripts that are automatically run over the course of a container's lifecycle. For example, you may want to automatically start which can be accomplished by adding this line to your devcontainer.json.
1"postCreateCommand": "docker compose up -d",
Other common options are to run compose build or compose pull. Or use the postAttachCommand instead to only run when the developer attaches to the workspace.
Conclusion
In this guide, we explored how to use Docker Compose with Daytona workspaces to streamline your development process. Whether you use the default Daytona workspace or create a custom dev container, integrating Docker Compose allows you to define and manage multi-container applications consistently across environments.
We encourage you to try using Docker Compose in your Daytona projects. Experiment with different configurations and witness how these tools can enhance your productivity and collaboration. Leverage the power of Docker Compose and Daytona together to create a more efficient development workflow.
Refer to the official documentation and community resources for further guidance and best practices. Embrace the benefits of Docker Compose and Daytona in your projects and unlock a new level of efficiency in your development process.